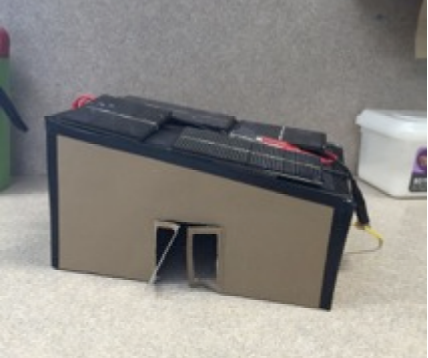
Mini Solar Houses Unit

1. Students will understand how to use an Azimuth finder to determine the direction and altitude that solar modules will face. 2. Students will learn how to describe why a solar module is pitched at a particular angle. 3. Students will understand how to measure the voltage and current for an electrical energy source. 4. Students will learn how to build a circuit that will light a light bulb with a switch and without a switch. 5. Students will understand that the electricity flows through a circuit from an energy source to a load. 6. Students will understand the difference between open and closed circuits. 7. Students will understand the similarities and differences between solar cells and batteries as an energy source. 8. Students will understand how electricity flows through a circuit (from energy sources to loads) with more than one source and more than one load. 9. Students will understand how to build series and parallel circuit and the characteristics of each. 10. Students will learn to power both a light and a fan. 11. Students will learn how to find a fault in a circuit. 12. Students will understand that the electricity flows through a circuit from an energy source to a load. 13. Students will understand the difference between open and closed circuits. 14. Students will identify the causes and solutions to various complications that arise in the construction of circuits. 15. Students will use the design process to create a roof to hold an adequate number of solar modules to power an LED and a fan. 16. Students will understand how to make a geometric net (a 2D drawing that when folded creates a 3D shape) for designing a roof.
In Lesson 1, the lesson focuses on understanding how the angle and orientation affect the amount of energy that is generated through use of a solar cell. Paper azimuth finders, Keva Planks, and multimeters will be used in order for students to draw conclusions about the optimal placement of a solar cell. This lesson will prepare students for the construction of a roof for their solar home based on these angles. In Lesson 2, the lesson is designed for students to learn about circuitry and how solar cells compare to batteries. Part 1 Solar Circuits is the first of three activities in this lesson. Now that students have an idea of how to position the cells to get the optimal current and/or voltage, they will begin the day with an idea of how to connect the solar cells to another voltage source or a load. Having both batteries and solar cells as part of this lesson will help to strengthen the idea of energy transfer and the similarities/differences between energy sources. Once students have mastered the simple circuit with a switch, they will be prepared for part 2 of this lesson when they learn about wiring series circuit and parallel circuits. The final lesson is a design challenge for students to work through. In previous lessons, students will have found that two 2 V in a combination of series and parallel connections with two 1.5V solar modules were needed in order to light the LED and the solar motor. Based on this idea, students will need to design a roof and walls that would ultimately hold the solar cells and yet allow the house to fit on an 9” X 12” sheet of paper. This lesson has a strong mathematical connection and will need several days for the design process. The possibilities are endless and the outcomes will be a result of innovation.
